In Django Hello World! we verified the Python installation, got Django installed, and output ‘Hello World!’ from the Python shell.
Next up: running a Django web page on a local server!
Primary Django Web Page Components
- urls.py
- views.py
- models.py
- template.html
- settings.py
URLs and Views
At a minimum, we need to configure these two elements. The urls.py file contains the information Django needs to determine which view to process, while the views.py file contains the logic to determine what to display in the browser, typically using an HTTP response.
Templates, Models, and Settings
With templates we can process the response from the views and display it using custom HTML. We simply have to point the view to the correct template file to control how the response is displayed.
The models.py will contain all of the configuration information for your database. This file tells Django what tables to create and how the columns of those tables should be configured. You can also do some cool things with overrides and the meta tag, such as set a custom ordering sequence, configure how the record will display by default when the table is queried, and even dynamically change values before saving an entry.
The settings.py file lets us customize things like the static files location (which would house JavaScript or CSS files), database configuration (SQLite 3 is used by default, but we can hook our application up to an external database, such as a PostgreSQL or MySQL database), and a list of the apps installed in our project, among others.
I’ll put up a post later about how to configure all of these things to get a web page running on a hosted server, so please sign up for the newsletter if you’d like to be notified!
Running a Local Server
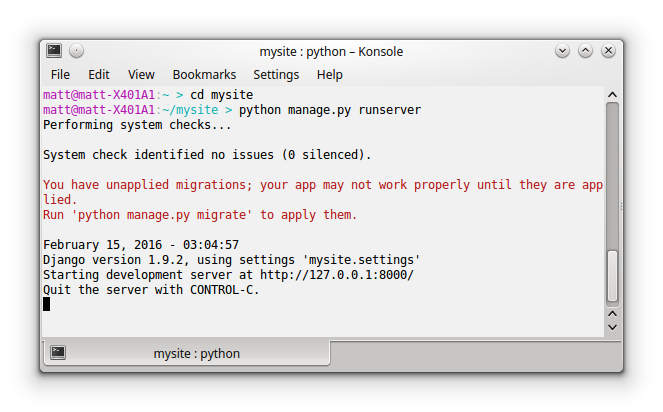
Django has a nice built-in server that you can use to test your web page locally. In the terminal, navigate to your mysite directory, and run the server as shown below.
|
|

You’ll notice the output shows a warning about unapplied migrations. This is because we haven’t set up our database yet. It won’t stop us from loading the server, but it sure is annoying. We’ll take care of that in a minute.
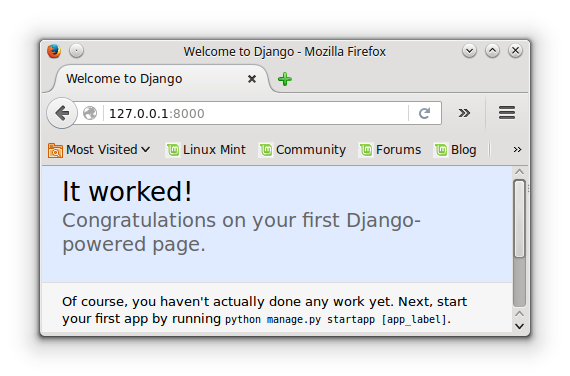
Now you can open a web browser and navigate to 127.0.0.1:8000 or localhost:8000 and you’ll see that the server is actually running.

Next, let’s fix that migrations warning.
Run Initial Migration
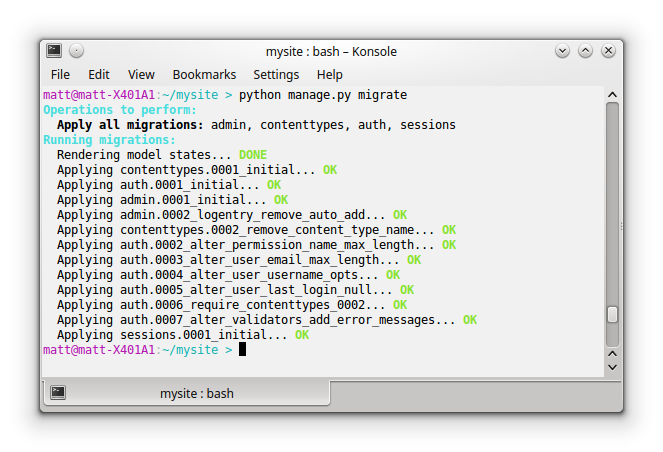
Django does a lot of the heavy lifting when it comes to building and updating the database, through a tool called migrate. Since this is a new database, we don’t have to actually build any migrations, so let’s go ahead and migrate to set up the default site tables. This will get rid of the runserver warning.
In your terminal window, stop the server by hitting ctrl+c, then perform the migration as shown below. NOTE: If you hit ctrl+z by mistake while the server is running, you will exit the runserver view, but the port will remain open until you close the terminal and open a new one, or kill the process.
|
|

This creates a db.sqlite3 database file in the mysite directory and adds all the default authorization tables.
Creating An Application
Now that we have a project set up and a database created, we can set up our first app! The following command will create the app directory structure for you.
|
|
A new directory will appear in the mysite project directory with the name myapp, which contains several important files by default. We still haven’t actually created a web page, so let’s do that next.
Setting Up the Views
Views are the primary location for all of your Django web app project code. Views can be called when the site loads, from links on your web pages, or by other views. Each view performs a specific operation, and is typically used to save forms, update database records, and render an HTTP response.
The URL will point to the view, and the view will render a response, which can be passed into a template for output customization using CSS, HTML, and JavaScript.
Add an Index View
Navigate to your app directory an open the views.py file.
|
|
mysite/myapp/views.py:
|
|
Hit ctrl+o, then Enter to update the file. Your view is ready to go!
Setting up the URLs
Next, create a urls file for myapp. As I mentioned earlier, this file will tell Django which view to process based on the URL typed in the web browser. We’ll be importing the views package, and pointing to the view we just created: views.index.
|
|
mysite/myapp/urls.py:
|
|
Hit ctrl+o, then Enter to save the file.
Next, we need to tell our mysite urls.py file to include the myapp urls.py file. Navigate to the mysite directory, and edit the urls.py file there. Notice we are one level down from the project root, in a directory named the same as the project. These are project-level settings for all apps contained in the project directory.
|
|
Update the first import line with the include package, and add your myapp.urls file to the urlpatterns array.
|
|
Now when your app processes a URL sent to it by the browser, it will look in the mysite/mysite/urls.py file for a match. Since this file contains the mysite/myapp/urls.py file, those will get checked as well.
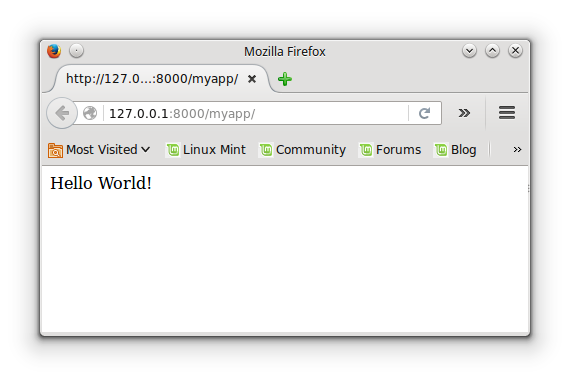
Now you should be able to run your server and see the output of your index view.
|
|
Open your browser and type 127.0.0.1:8000/myapp in your address bar. This will match the r'^$' root urlpattern in the mysite/myapp/urls.py file.
Note: if you only have one application in your project and don’t plan to add any more, you can remove ‘myapp’ from the regex string of the myapp.url url pattern in the mysite/mysite/urls.py file. This will then direct the browser to the mysite.urls file when the site is accessed at 127.0.0.1:8000/.
Congratulations! You now have a very basic Django framework website running on your local machine!

One last thing: Virtual Environments
A virtual environment, or virtualenv, helps to keep packages separate between different projects and versions of Python. This is important, because as Python evolves and package versions get upgraded, you can easily and quickly install the correct versions of all packages related to your application, without having to worry that the package versions you have will support the code included in your Python module or program.
The other benefit is that you can have multiple versions of a specific package installed simultaneously on your machine. This is crucial if you’re working on several different apps, as each project may have different requirements. If you install a package to a virtualenv, it ONLY exists inside that virtualenv, and will not interfere with applications that need a different version of a particular package.
For now, just trust me that you definitely want to be using virtual environments, so go ahead and run the following command in your terminal:
|
|
You’re Ready to Rock!
The next step is to find a host for your website, which I will be talking about a few posts from now. If you’re just starting out, it might be a good idea to look for free hosting, just so you can get your application on the web and quickly get feedback from friends and relatives. When I started out, I used Heroku for my test websites. If you know how to use git, deploying to Heroku is incredibly simple once you make a few configuration changes to your project.
In the meantime, please check out the in-depth tutorials by the folks over at the Django Project. They’ve put together a tremendous resource if you’re interested in learning more. If you just can’t wait to configure the models and templates for your app, they’ll walk you through how to set those up. Just follow the excellent Polls app tutorial.